With the KTM Powerparts (including soft saddlebags) and a Perun luggage rack installed, my initial voyage on the KTM 690 Enduro R travel bike project went well, but I felt I needed to add one more piece: A windscreen. I planned to take the bike to Newfoundland in mid-August, and previous experience riding The Rock had taught me that protection from wind and weather would be welcome.
There are plenty of universal-fit windshields that I could have mounted on the 690, but I was really only interested in one: The Adventure Spec Universal Mini Fairing. The crew at A-Spec are serious adventure travelers themselves, and know how to build gear that is functional, durable and fairly priced. Previously, I’d used the Magadan panniers on my DR650 as well as a Super Sherpa and KLR650, and found they exceeded expectations. With that in mind, I sent Adventure Spec’s US office a note (they are based in the UK, with an arm in the US), and they sent me a Universal Mini Fairing to install on the KTM. Regular asking price is $161 US, but they sent me this one at no cost for the test.
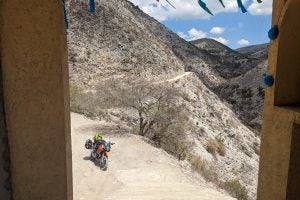
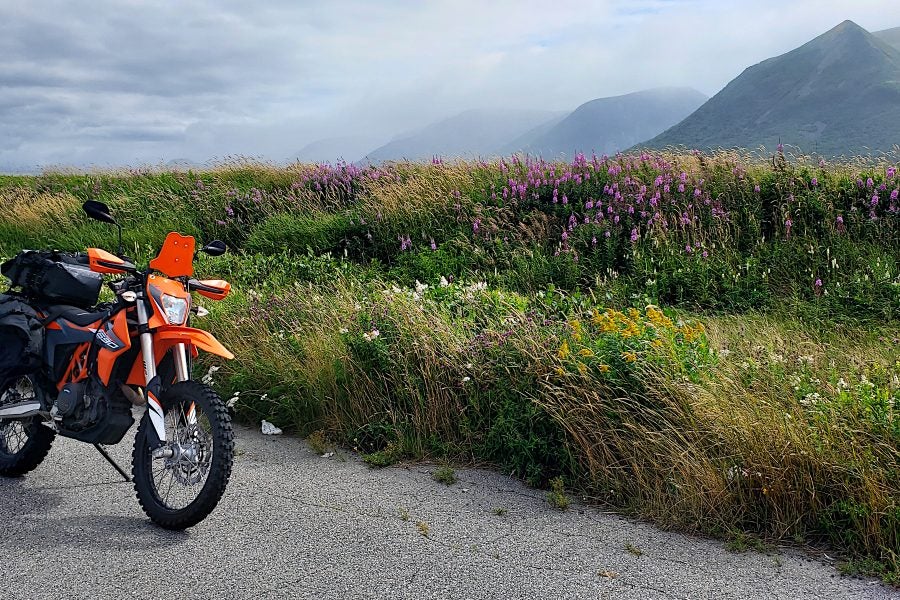
There are farms in Newfoundland? Who would have guessed? Note the far-forward angle that I used for the Mini Fairing. The angle is adjustable; this worked best for me, but if you wanted something different, that’s easy enough. Photo: Zac Kurylyk
Installing the Universal Mini Fairing
Installation is extremely non-complicated, and Adventure Spec includes a Keep-It-Simple-Stupid instruction sheet in the box. Put the mini fairing together (a handful of machine screws) and then bolt that to the handlebars with the universal mount (make sure you order the right handlebar diameter—it’s available in standard or fat bar configuration). Don’t take my word for it—see the company’s official installation DIY video below.
Extremely easy stuff, and the Mini Fairing is fairly minimalistic, so you don’t have to worry too much about it interfering with other accessories or slowing down your steering. Although many parts are made out of metal, the mounting arms which attach to your handlebars are plastic, and I think that if you had the misfortune to go over the bars and land directly on the fairing or become entangled with it in a crash, that these plastic parts would be far more forgiving than metal components.
Part of the Mini Fairing’s intended usage is not just to block wind and rain, but also to provide a mounting surface for your GPS and other gadgets. In my case, all I mounted was a wireless cellphone charging mount from Quad Lock. Since I was in mostly familiar territory, I had no need for a more powerful and capable GPS unit.
I had to think carefully about how I wanted to mount even something as simple as the Quad Lock, but it was fairly easy. I did put two nuts on the mounting bolts and also added some electrical tape in places to provide damping from the single-cylinder engine’s vibration, so the mount would be less likely to shake itself apart. It turned out this was unnecessary, but such a belt-and-suspenders approach will sometimes save you from annoyance or even serious trouble down the road.
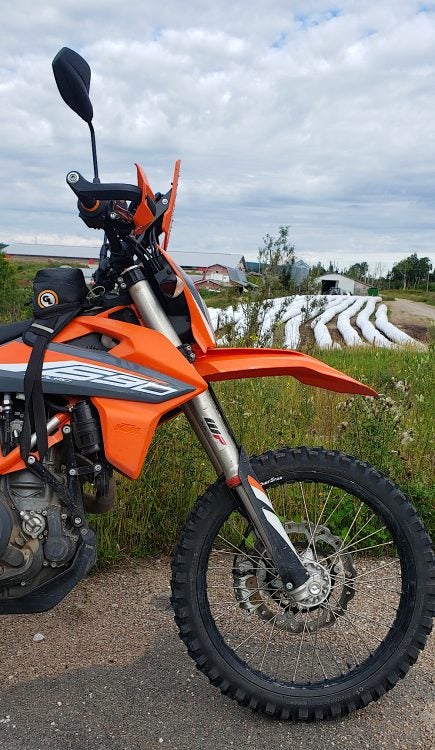
The back of my mini-fairing was fairly uncluttered, as I only installed a phone mount, but Adventure Spec designed the mount to hold a charging socket, a GPS and an on/off switch for your heated grips. Photo: Zac Kurylyk
On the road
The KTM 690 Enduro R is not known for high-speed touring, but I did put in long days on my Newfoundland trip, much of it in extreme weather. The Mini Fairing served its role perfectly. It blocked a lot of weather, it was light and unobtrusive, and when I went off-roading on the 690, it didn’t get in the way. It had the perfect blend of maneuverability and usefulness. I had zero complaints, no noted deficiencies—it was exactly the tool for the job.
I do suppose that some riders might not like the asking price, and they might point out that they can make the famous “trash can windscreen” or something like that for much less money. Indeed you can; but most riders wouldn’t mount their GPS or a cellphone to the inside of their trash can windscreen. The Mini Fairing is doubly useful, as it’s the perfect place to mount and organize all your navigation equipment, switches, charging ports, etc.
Not all riders will want that, and not all riders have $161 to spend on the Mini Fairing, and that’s fine. But if you do have the money to spend on well-made accessories, and you need the Mini Fairing’s features, I would highly recommend you consider it.
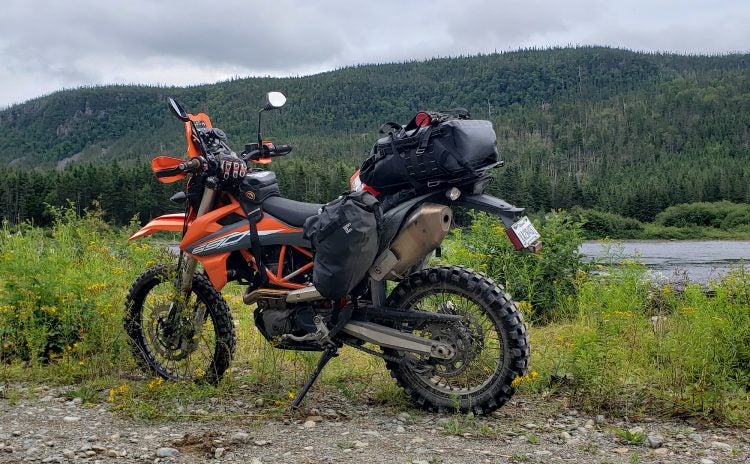
Of course I was still experiencing wind resistance, as this fairing is small, but it blocked enough of the breeze to make long rides comfortable. Photo: Zac Kurylyk
The end of the project
The bike’s final configuration for my whirlwind tour of Newfoundland’s southwest coast was: Adventure Spec Universal Mini Fairing ($161), KTM Powerparts handguards ($104) and soft luggage ($330), Perun Moto rack ($207), Nelson Rigg Hurricane backpack/tailbag ($170) and a Giant Loop Buckin’ Roll tankbag that I had laying around from a previous project ($99). With this configuration, I had room for everything I needed—camping gear, clothes, tools, camera, even a laptop for work on the road. I was able to live a week like this, and as any experienced traveler knows, if you can make it for a week on your luggage, you should be able to make it for a year.
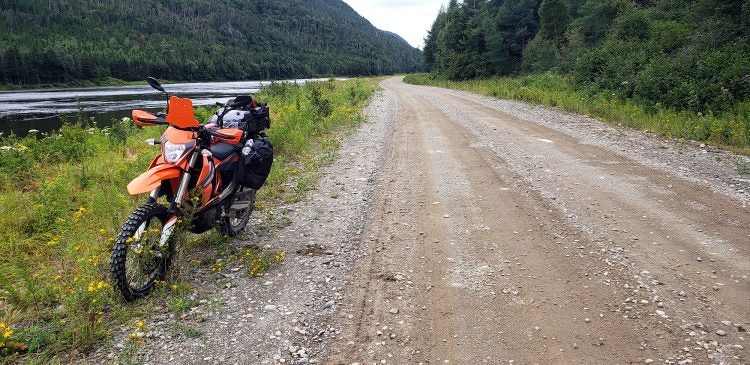
All the farkles were easy to install, and if I’d done it all in one go, I could have put them on the bike in half an afternoon. I also could have removed most of them in minutes if I wanted to hit more aggressive trails. I did take the bike up some fairly rugged two-track access roads to survey Newfoundland’s barrens from radio tower peaks. While I would have chosen a different luggage system if my trip consisted entirely of these trails or included single-track, I found my configuration was a great compromise between ease-of-access for road travels/camping and usability on unpaved roads.

A Keep-It-Simple-Stupid project. Alas, the bike had to go back at summer’s end. Too bad; it met my needs perfectly. If I’d started from scratch, I might have gone with a luggage system that kept weight lower, and I would have added some heated grips if I had the bike long-term. But for this trip, it worked perfectly. Photo: Zac Kurylyk
Added up, the pieces would have cost just under $1,100. I don’t think that’s unreasonable, considering they were well-made and changed the bike from a dual-sport into something truly travel-capable, doing long days at extra-legal highway speeds in relative comfort. If I had started the build from scratch, with no Powerparts pre-installed, I could have saved some money and gone with less-expensive handguards or maybe a different luggage system. However, I think the price difference would have been $300 or less, unless I shopped on the used market. As well, if I’d been keeping the bike past the summer, I would have added folding mirrors, heated grips and looked into extra fuel storage. In the long term I might have replaced the seat, but the only day I experienced discomfort was a 12-hour slog when I needed to make big miles in extreme heat. However, I needed none of those parts for the 2022 riding season.
Alas, the bike had to go back to KTM at end of the summer, but I have fond memories of my travels with it. This was one of the easiest touring bike projects I ever put together, but also one of the most capable; it traveled easily in the fast lane on east coast highways, but was still light and manageable enough to head down tight woods trails. It might not have been the perfect bike for travels out here in Atlantic Canada, but it was closer than any other machine I’ve put together yet.